Sunday, November 20, 2011

What Makes Me Happy

This month our challenge at Crafty Chicas is to share what makes us happy!
My life lately hasn't shown me a lot of happiness. It was very good for me to think about all the things that make me happy. There are lots of things that make me smile and bring me happiness. 
My children are the main things in my life that make me smile.


This was an exercise in finding other things besides them. Each little rectangle is packed with all those things. It is packed with pink. Pink is my favorite color, so I had to include plenty of pink.

I hope this inspires each of you to think about all the things in your life that make you smile.  
Make sure you join our monthly challenge and share those things that make you smile with us!  
SMILE~~ 
Daphne~~

Tuesday, November 15, 2011

Give Thanks

Well with Thanksgiving right around the corner everyone is thinking about what they are Thankful for.

There are so many things in my life that I have not been thankful for lately, that it is very good to stop and think about the things I SHOULD be thankful for.
So let me say this...I am thankful for my children, my friends, my family and my puppies.
There are many other things too, but those are the biggies!!

This beautiful Cornucopia was cut using the ProvoCraft Cricut using Paper Doll Dress Up cartridge. The Give Thanks was cut using the Designer's Calendar cartridge and the apples were cut using the My World cartridge.
The flowers and leaves are Prima. They are sprayed with Smooch Spritz. The centers are Viva Decor Pearl Pen in bronze.
The letters are covered with a thin layer of Viva Decor Pearl Pen.

BE THANKFUL FOR THE PEOPLE IN YOUR LIFE AS YOU NEVER KNOW WHEN THEY WILL NO LONGER BE PART OF YOUR LIFE!!

~~DAPHNE~~

This project is entered in the following challenges:

Thursday, November 10, 2011

KINDERSTAMPO GUEST DESIGNER FOR TODAY

Today I am the guest designer over at Kinderstampo. I am very happy to be featured today.
This is a little mini-album I created for her.

I used Jillibean paper. It is made using only 1 sheet of 12x12 paper! It's really easy.
You score the paper at 3", 6" and 9" in one direction. Then rotate the paper 90 degrees and score it at 2", 6" and 10". Cut along the 6" line (on the 2/6/10 side) up to the 9" line. Fold at the 2" and the 10" line to make the pockets.


I used the Kinderstampo- Grungy Inspiration stamps to make the little tickets.
The tickets were cut using the Cricut- using the Mickey Font at 2" in length.
I used Tim Holtz's Tiny Attacher to attach the tickets to the tags.
The little pearl swirls are from Zva Creations.
The little clip on the front is from K&Co.
All the inking was done with Tim Holtz Distress Ink pads- Vintage Photo and Forest Moss.
I used my ATG to hold the pockets and to attach the two center pieces together to make the middle of the booklet.


This is such a cute and easy project. Think of it as a baby gift or grandma's brag book! I am going to make several of these as gifts this year.

ENJOY
~~DAPHNE~~

Monday, November 7, 2011

BIRTHDAY BLOG HOP WINNER!

Oh my...I don't know how I missed picking a winner!! But I got my son to pick a number between 1 and 17 and he picked 7 so the winner is:


MALLIKA!!!!

PLEASE E-MAIL ME YOUR MAILING ADDY SO I CAN GET SOME GOODIES OUT TO YOU!!
Daph66@shreiber.com

Thanks everyone for all the kind comments. I enjoyed doing the Birthday Blog Hop!


Thursday, November 3, 2011

FRIENDS LIKE HEIDI KEEP ME AFLOAT!!

Thanks for stopping by today. I made this cute little wall hanging for my friend Heidi! I wanted her to know how much her friendship has meant to me during the past year!!
This was a project for over at The Crafty Chicas!!

SUPPLIES AND BASIC INSTRUCTIONS:
1)Maya Road- 4" Bottle Cap
2)Large Circle in back- Arctic Frog- Sugar Sprinkles- Cut using Martha Stewart's Circle cutter to size 5 1/2"- then punched with the border punch- attached with Beacon 3-in-1 Adhesive- inked with Tim Holtz Distress Ink Vintage Photo
3)Cupcake Wrapper- inside- flattened- sanded with Tim Holtz Sander- inked with Tim Holtz Distress Ink Vintage Photo- Sprayed with Smooch Spritz Vanilla Shimmer- heat set- attached with Beacon 3-in-1 Adhesive
4)Mouse image is from a swap- colored using Promarkers- mounted with pop dots
5)Tiny flowers- Prima- attached with Helmar Acid Free Adhesive- Center is Viva Decor Pearl Pen
6)Ribbon from my stash- I poked holes in the orange ribbon and threaded the brown through it, used atg and 3-in-1 to adhere the ribbon to the back of the hanging
7)Stick pin- base- Bead Landing-Head Pins- beads from stash- attached using 3-in-1 and scotch tape to the back  

Wednesday, November 2, 2011

GRANNY'S RECIPES

This week over at The Collector's Cut the girls are all sharing their creations related to recipes.


This is a little mini-album that contains some recipes that my Granny wrote for me after I got married. They are my favorite recipes that she used to make. I love making these yummy cookies every year at Christmas time. I know that my daughter will love receiving this wonderful tribute to Granny some day in the future.

SUPPLIES:

Blank 4" x 4" coasters

Ribbon from Stash

Title- Cut using the Cricut at 1.25" using From My Kitchen and Lyrical Letters

Viva Decor- Black Glitter Liner


Tuesday, October 18, 2011

Halloween Candy/Pencil Holder- Mini-Monster


This month we have a fun challenge going on over at the Chica's Gettin' Crafty blog.
We want you to share your little monsters with us!! Enter the contest and you will get the chance to win a gift certificate to our sponsor this month!! Jens Digi Stamps

So, this month the design team were given Halloween digital images from Jenn to work with. I thought it would be fun to make an altered container and fill it with candy, but it's also big enough to be used as a pencil holder after the candy is gone!! Check out more details and enter the challenge over on the Chica's Gettin' Crafty Blog!!


Saturday, October 15, 2011

It's My Birthday Blog Hop- Alice in Wonderland Halloween Wall Decor

Welcome to Day Two of the It's My Birthday Blog Hop!!


You should have come here from Jen's Craft Corner. If you are coming in the middle of the blog hop, head over to

I hope you enjoyed yesterday. There were so many great projects. If you missed it go back and check them out.

I decided to combine today's Blog Hop post and my project over at The Collector's Cut. I know it's not b'day, but since my b'day is in October, I just LOVE Halloween. It is my FAV holiday! So I thought it would be fun to share this today.

HERE IS THE LIST OF BLOGS FOR THE IT'S MY BIRTHDAY BLOG HOP:


I created a Halloween Decor item.
This is a cute little wooden shadow box I picked up at The Dollar Tree.
I used the Accent Essentials cartridge to cut the scalloped edges. I used the Gypsy to weld together several pieces to make the long edges pieces.
I used the Classic Disney cartridge to cut the Alice. I made her to match the Alice that appears on the Graphic 45 paper I used. All the paper and little paper embellishments are all from Graphic 45,


SUPPLIES:
Graphic 45 Halloween in Wonderland paper and embellishments
Bazzill Bling
Buttons- vintage I inherited these from my Grandmother
Key- Dollar Spot at Michaels
Paper Flower is handmade. I bought it at a craft show. I sprayed it with Smooch Mist. Pearl
Stick pin- Recollections
Paper Clip- Making Memories
Tiny Paper Rose- Recollections
Gears- Blue Moon
Bling- Recollections Bling on the roll
Brads- Recollections
Viva Decor Pearl Pens
Beacon 3-in-1 Liquid Adhesive, Foam Pop Dots, Helmar Craft Glue


THANKS FOR STOPPING BY!! I hope you are enjoying the Blog Hop!
Leave a comment and become a follower (before midnight EST Sunday Oct 16th) here and get an opportunity to win this great Blog Candy!!

I will choose a winner at random from all the comments and followers for the weekend.

~~Enjoy~~
Daphne

Friday, October 14, 2011

It's My Birthday Blog Hop

Welcome to Day One of the It's My Birthday Blog Hop!!

You should have come here from Jen's Craft Corner.
If you are coming in the middle of the blog hop, head over to:


I hope you are enjoying the blog hop. There were so many great projects. If you missed any of the blogs....go back and check them out.

HERE IS THE LIST OF BLOGS FOR THE IT'S MY BIRTHDAY BLOG HOP:


Daphne-YOU ARE HERE!!!
Jess B -GO HERE NEXT!!


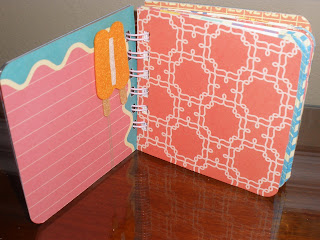
Today I want to share this cute little Birthday Mini-Album. It is all ready for the recipient to put in their photos. It is 4" x 4". The front cover is clear plastic. It is bound together using a Bind-it-All.


Thanks for stopping by! I hope you are enjoying all the projects we have to share with you this weekend.

Please leave a comment and become a follower of my blog (before mindnight (EST) Sunday Oct 16th) for a chance to win some yummy blog candy!! Check back tomorrow to get more details on the blog candy.

I will be choosing a winner on Monday October 17th at 8:00am at random from the list of comments.

~~Enjoy~~
Daphne

Thursday, October 13, 2011

Don't miss our blog hop tomorrow!!


I am in a Birthday Blog Hop this weekend. It starts tomorrow!! Don't forget!! It will start over on Addicted To Scrapbooking


Tuesday, October 11, 2011

Cookies & Hot Chocolate Gift Set

Today on Chica's Gettin' Crafty I am sharing a fun gift set. Who doesn't love cookies with hot chocolate!! Check out the details over on the Chica's blog!!

Don't forget to enter the monthly followers challenge while you are there! Share your little monsters with us and get a chance to win a gift certificate to this month's sponsor's website!

Friday, October 7, 2011

Monster Mash Lighted Canvas

I was so excited when Maggie said she wanted to post my Monster Mash canvas on her blog- Passionately Artistic.

This was a really fun canvas to make. I was walking around the store looking at the Halloween decorations the other day and saw a lighted sign. It was $20+ and I thought...gee I can make that, and it will be cuter and cheaper!

Well once it was done and I plugged it in to look at it, I was very thrilled with the results. One of my fellow crafters commented that the lights look like creepy fingers with orange nails.
But, I think the best compliment was when I showed it to my 14 yo son and he said- "OOoh I like that, can I have it." I am going to make him a lighted canvas, but he can't have this one.

I hope you find some inspiration to create a lighted canvas of your own.


STEPS:
1.) Paint the edges of the canvas with black acrylic paint. Sides and 1" in all the way around.

2.) Cut the paper to 11"x12". Use Beacon 3-in-1 adhesive to attach the paper to the canvas. I then used a brayer to roll it out to make sure it was flat.

3.) Cut and assemble Frankenstein and Bride of Frankenstein with the Cricut using the Happy Hauntings cartridge at 7"

4.) Cut grass at 1/2", fence at 2", a spider at 2 1/2", a spider at 2" and Monster Mash title at 3 1/2" (ALL MEASUREMENTS ARE THE HEIGHT)

5.) Cut hand at 1 1/2" in green and 2" in black- I attached the black hand flat to the paper and bent the green hand up so it looks like the black is a shadow of the green hand


6.) I used the Distress Inks and Gelly Roll pens to accent the images.
7.) Frankenstein and Bride of Frankenstein are attached using foam dimentional tape.
8.) I used a hot glue gun to attach the lights to the back of the canvas.

Supply list:
11"x13" Stretched Canvas
Black Acrylic paint
Piece of Halloween Paper-Die Cuts With A View- Midnight Spell stack
50 Miniature Indoor/Outdoor Lights
Hot Glue Gun and Hot Glue sticks
Cricut with Happy Hauntings Cartidge and
Bazzill Solid Cardstock
Basic Grey- Bling It Rhinestones- Spider Web
Ranger Inc- Tim Holtz Distress Ink Pads
Sakura Ink- Stardust Gelly Roll pens
Adhesives: Beacon 3-in-1, Foam dimentional tape, hot glue

ENJOY
~~DAPHNE~~

Wednesday, October 5, 2011

Sketches in Thyme-DT Sketch

I have recently discovered how fun sketches can be. This sketch is from Sketches in Thyme. I did this one in hopes of being chosen for their Design Team.
Here is the sketch they have asked us to use. You too can apply to be a SIT Maven. Click on the link above for details.

There are trials and times in your life where you find out who your true friends really are. I have been going through some things in my life and my friends have been my strength.
Melissa and I have been through some ups and downs in our friendship, but it has proven to stand the trials. In honor of our friendship this is my take on this great sketch. I think it came out pretty.

I used the Girls' Paperie by Margie - Paper Girl line. The shaped patterned paper, vintage buttons, clocks, rose, charm and little word stickers are all from this line. The solid cardstock is from Bazzill. The dotted patterned paper is Serendipity-"Scrumptious"- Coconut Cream. The ribbon is from my stash.

The title is cut with the Cricut using the Billionaire cartridge. The inking is using Tim Holtz Distress Ink- Vintage Photo. The flower and clocks have been sprayed with Smooch Spritz- Vanilla Shimmer.

I used my ATG gun and Beacon 3-in-1 Adhesive.


Tuesday, October 4, 2011

Shaped Card Challenge-The Collectors Cut

I am very excited to share with all of you that I was asked to join in the fun over at The Collectors Cut blog. We will be making two projects a month over there. All the projects are using the Cricut machine. We are hoping to get more use out of the cartridges we have and to inspire some of our crafty friends to get out their Cricuts and use all those wonderful cartridges you own that are collecting dust!!

The challenge this time was to make a SHAPED CARD.
I decided to use a cartridge I had not used yet for my own personal goal of using all my cartridges in 2011, and I chose Wild Card.
I cut out the quote bubble card. Then I flipped it and cut it again, because I didn't use double sided paper! I glued the two together so there was pretty paper on the inside.
I used the EK-Success flower punch on the owl in the center of the card and the Stampin-Up Banner punch on the little guy on the bottom right.
I love to ink and I used Tim Holtz Distress ink in Vintage Photo.
The words are also cut from the Cricut using the font on Wild Card. I welded it using my Gypsy before cutting at 1".
I used Helmar Acid Free Adhesive to put it all together.
The paper is from Target in the Dollar Spot. It is all from the new owl fall pack. It was purchased only a couple of weeks ago! It is SOOOOooo cute!

Get out your long lost cartridges and start crafting!!

Monday, October 3, 2011

Crafty Chicas Halloween Decor


This month the design team was asked to use Orange, Purple and Black in celebration of Halloween. I thought it would be fun to make a really neat free standing tri-fold decoration. I am eager to get this out and display it in my house.
You can get more details over at the Chica's Getting Crafty Blog.
Don't forget to join the blog challenge this month. Share with us your monsters and get a chance to win a gift certificate to the web site.

I wanted to share my decor so I entered it in the following Challenges:

Friday, September 30, 2011

Tuesday, September 13, 2011

Veteran's Thank You Card


Stop over to Chica's Gettin Crafty to see the list of supplies I used for this Thank You card.

Don't forget to check out the monthly Scraps Challenge while you are there. Use up some of those scraps you have around!!


Saturday, September 10, 2011

Chica's Monthly Scrap Challenge- Birthday Card

This month over at the Chica's Getting' Crafty blog the followers challenge is to use your scraps. So I got out my scraps and made this cute little birthday card.
Pop on over the the Chica's Blog for the list of supplies for this card.
While you are there why don't you get out YOUR SCRAPS, get crafty and join us. If you upload your creation you get a chance to win a nice Close to My Heart prize package.

Thursday, September 8, 2011

KINDERSTAMPO GUEST DESIGNER BLOG HOP!

I am soooo excited to have been selected as a Guest Designer for Kinderstampo!!
I can't wait to share my creations with all of you and to get to know some new crafty ladies!!

Let me tell you a little bit about myself!!


LIVE:
For me living is all about my family. I have 3 wonderful kids and they are the most important people in my lives. I try to tell them I love them everyday. My life would not be complete without their wonderful faces to brighten my day!!

CRAFT:

Crafting is my passion. I have been a crafty person since I was a child. My mother was the Brownie leader and always doing some kind of crafting thing. I have dabbled in so many things! Cross-stitch, needlepoint, macrame, jewelry making, knitting, sewing, altered art, scrap booking, card making....I am sure I have missed so many of them. Crafting is something that I just couldn't do without in my life! It has given me strength when I thought the world was crumbling around me and it has given me purpose when I have had none! Crafting is such a fabulous and important part of my life. I also am very passionate about sharing all things crafty with my friends and well...let's face it just about anyone that will listen! LOL! I hope that I can share some of that passion with you!!

INSPIRE:

So many things in my life inspire me. I find inspiration in nature and the world around me. I find inspiration in the many talented friends I have. Life in general is where I find my inspiration. I have been going through some rough things recently and I have been trying to find inspiration wherever I can and I have found that it is always out there if you open your heart and mind to it....you will find it!


For a chance to win some blog candy from KinderStampO

Stop by the KinderStampO Facebook page and let them know I sent you
and/or leave a comment on each of the guest designers blogs.

One lucky winner will win a prize from KinderStampO

The next stop is Jessica Baker


HERE IS A COMPLETE LISTING JUST IN CASE YOU NEED IT:

Thursday Night Sketch- Chica's Gettin' Crafty

So, here is the sketch for tonight! You can check out the other Design Team take on this fun sketch at the Chica's Gettin' Crafty blog.


HERE IS MY TAKE ON TONIGHT'S SKETCH:


Monday, September 5, 2011

Sept NSSS Weekend Challenges

Had a fun time this weekend with my peeps from NSSS!! They have been my friends through thick and thin for years now! A couple times of year we do a weekend of challenges. This past week was that weekend. So, while I was at a local crop I got these two projects done.


Card using a card sketch she provided for us. I used scraps from one of the girls at the crop I was at. The buttons are from a baggie of buttons I got at the Goodwill last week. I used Beacon adhesive to attach the buttons and ATG for the paper.

This layout is also using a sketch the hostess this time provided. I love these photos and I think this came out so cute. The patterned paper and the word strip are from We R Memory Keepers. The solid cardstock is from scrap. The tickets are from Tim Holtz and inked around the edges with Distress Ink. The dots on the green are Viva Decor Pearl Pens. I used pop dots for the tickets and the title strip, ATG for the paper and Helmar Acid Free glue for the photos. I find that you need to use liquid glue to attach things to the glitter paper.


Friday, September 2, 2011

Scrap Challenge Mini Tag Album


Today I wanted to share a cute Mini-Album I did about my girlfriends. It was for the Chica's Gettin' Crafty blog monthly challenge.
You should get out your scraps and get crafty and enter the challenge. There is a great CTMH package of goodies to be won!!


Sunday, August 28, 2011

Hippo Birdies Two Ewes Birthday Card

I am making some birthday cards for my friend Teresa to give to her fellow teachers. Every year she gives out more then 70 cards, so I started last year helping her make them. Here's another of my creations.
I got the inspiration for this card from when I was growing up. I remember this saying from a card I received and it popped into my head, so I thought it would make a cute card.


SUPPLIES:
Hippo- Cricut cut- Animal Kingdom cartridge
Birdies- Cricut cut- Paper Pups cartridge
Ewes- Cricut cut- Winter Frolic cartridge
Sentiment- Cricut cut- Cherry Limeade cartridge
Paper- Kaiser Craft, Best Creation Inc and Bazzill
Ink- Tim Holtz/Ranger Inc.- Distress Ink- Faded Jeans
Glittery Highlights- Sakura Jelly Roll-Stardust pens
Adhesive- Helmar Art & Hobby Adhesive


I have entered this card in the following challenges (check them out!):
Easy Craft Projects -photo inspiration
Creations by GillM -anything that flies
If The Shoe Fits- Scrap It -Jungle Book inspired
Forever Friends -Include an animal


Saturday, August 27, 2011

LESSology DT Application Project

I found the request for LESSology DT members on the Scrapbook Call Blog. I checked it out and decided I would give it a try!
I love making all kinds of repurposed projects.
So this is the project I put together. It is a canvas that I found at the Goodwill. I covered it with the Alice In Wonderland Halloween paper. Then I took an old costume and cut it up and made the fabric flowers that are along the edge. The centers of the flowers are old buttons cut off a dress. This project is a total Upcycle!!
The title I got from the Alice in Wonderland story. When Alice is at the Mad Hatter's Tea Party, the Dormouse recites...

Twinkle, Twinkle, Little Bat,
How I wonder what you're at:
Up above the world you fly
Like a tea tray in the sky,
Up above the world you fly
Like at tea tray in the sky.

Twinkle, Twinkle, Little Bat,
How I wonder what you're at:
Up above the world you fly
Like a tea tray in the sky.


Use 3-5 pieces, put them together. Use a needle and thread and sew a button in the center. This will also help hold the flower together. These buttons are ones from an old dress!

To get the pieces of thin material to look all wrinkly, you melt it over a candle. Be very careful it doesn't catch on fire. It is very easy to make these flowers!

I cut up a skirt from an old Halloween costume. I cut it into squares and then a circle, then to look like little flowers. You don't have to be perfect because you can make them look like you want when you do the next step, with the melting.

SUPPLIES:
Viva Decor Pearl Pens and Glitter Liners- accents and to attach the vintage buttons
Vintage Buttons
Repurposed 12x12 Canvas
Repurposed black costume
Repurposed buttons from an old dress
Twinkle Twinkle- cut with Cricut using Nursery Rhyme Cart
Little - cut with the Cricut using Graphically Speaking
Bat- cut with the Cricut using Simply Charmed
Helmar 450 Adhesive was used to attach the flowers
Foam PopDots used to to attach the title
This canvas is also entered in the following challenges:

Friday, August 12, 2011

Crafty Chicas Wedding Card

This month over at the Chicas Getting Crafty blog the assignment was wedding themed. I made this cute wedding card. Get more details over there, check it out!!
Don't forget to join in the fun with the follower challenge!! All you need to do is submit a wedding related layout.


Monday, August 8, 2011

Hoot Birthday Card-Challenge Entry

I made this adorable card for a friend. I think it came out so cute!

SUPPLIES:
Stampin' Up Owl Punch
DCWV Polka Dot Paper
Alphabet- Studio G Wooden
Zva Creative- Pearls
Tim Holtz- Distress Ink- Antique Linen
Faux Stitching- Zig Pen- Pure Brown
Scotch Tape Runner
Foam Pop Dots

LITTLE OWLS- paper is bazzill, they are a Stampin' Up punch


I am entering this card in several challenges this week:
Glitter Geeks- Week #9 - Furry and Feathery Friends
Delightful Challenges- Aug 3rd -Stitching- Real or Faux
Little Red Wagon- Challenge #92 -Put a Critter On It

Friday, August 5, 2011

You Are My Sunshine

You Are My Sunshine
My Only Sunshine
You Make Me Happy When Skies Are Grey
You'll Never Know Dear How Much I Love You!

I thought it would be fun to try something really different...so I used an actual vinyl record album as the base for this project!!
Check out more details over at Chicas Gettin Crafty!!

I love this photo! This was taken in May when Geoffrey graduated from Daytona College. These three are my sunshines!

I entered this fun layout in the following challenges:
Crafts & Me Challenges - Anything Goes

Thursday, August 4, 2011

Club CK 1-Hour Layout Challenge

This was fun. I have never participated in a one-hour challenge. Over at the CKClub they have them regularly, but I have never done one. Today I thought it would be fun to give it a try. Here is my take.
It was a challenge to use horizontal stripped paper.


This photo is of my mother and I taken in 1969 at sunset on Padre Island. I love this photo.

SUPPLIES:

Paper- Chatterbox- Scrapbook Walls- Beach Stripe, Beach Dot and Large Frisbee Stripe

Shells- Jesse James Buttons

Flower- Prima Floral Embellishments

Tim Holtz- Distress Ink- Vintage Photo

Circle is cut using the Cricut Expressions and the Christmas Cheer Cartridge

Studio G Wooden Alphabet Stamps

Helmar Adhesives- Tape Runner, 450 and Acid Free Glue

Friday, July 29, 2011

Paper Patch Sketch Challenge

***HAD TO COME BACK AND LET EVERYONE KNOW I WON FOR THIS CONTEST!! SO COOL!!***

This is a layout I did for the Paper Patch Crafts Facebook July Sketch contest.

The photo is of Wesley. We had walked past this statue of Goofy probably 100 times and he never wants to sit and have his photo taken. One day he just decided...Hey mom--let's get my picture here. He and I used to go several times a month to Disney World because we had yearly passes. This is something I hope he will remember when he grows up, because this was some very special times with just him and me.


SUPPLIES:

PAPER- CTMH, Bazzill

Black Bling Stars- from Recollections

Red stars and blue star strip- cut with the Cricut Expressions using the Stand Salute Cartridge

Two grey stars- Grungeboard from Tim Holtz
Embellished with Viva Decor Pearl Pens- Gold

I used Helmar Craft Glue to attach the Red Stars and the Grungeboard.
I used Xyron 150 to attach the strip of blue stars.
I used Helmar Tape Runner to attach the paper and the photo.